The most important tool that you can use throughout the semester is a calendar. Your calendar will keep you on track and give you a visual of what you have to complete. I recommend using an online calendar that you can easily update. An online calendar is important because of easy access, organization and presentation.
In this post I plan to explain the features Google Calendar has to offer you. In future post I'll go more in depth about how to put these features to use.
Once you have created your gmail you will have access to Google Calendar. You can access your Google Calendar by starting at your Google Search page. At the top of your Google search page you should see a black bar with labels that read from the left to the right starting with, Search, Images, Maps, Play etc. Eventually you should see a label that says "Calendar".Once you click on the label "Calendar" at the top of your Google search page you should see a calendar similar to the image below.

Above is a screen shot of new calendar that I created. In this post I will explain the features Google calendar has to offer and what they can be used for.
- Starting at the top left hand side of the page you will see a red button labelled "Create". Clicking on the "Create" button will give you the opportunity to plot an event on your calendar. The events that you create will represent required readings, study periods, class times, groups meetings and due dates for each class.You can create a event for anything that you feel its necessary for. By creating these events you are constantly preparing your self as the semester unfolds. Remember you are a hurdle runner in this race and by creating these events on your calendar you are timing your steps to successfully make a leap over the stick ahead of you.
- Below the "create" button there is a smaller monthly calendar. This is useful to have a visual to see where you are in the month and to see how much time you have left.
- Below your miniature calendar you will notice a label that reads "My Calendars" with a drop down arrow to the right side. If you click on the drop down arrow you can create a sub calendar for each class, which will eventually be inputted into your larger calendar.As you can see from the example above I have created sub calendars for each class. Now that you have a calendar created you can create sub calendar for each class that you have. After you create a calendar for each class you also have the option to color coat each calendar that you create by clicking on the drop down arrow on the right side. Go ahead and create a calendar for each class an color coat it.
- The last few features that I would like to mention are the different viewing options Google provides you. At the top right side of your calendar you have five different views that read from the right; Day, Week, Month, 4 days and Agenda. As you use Google calendar you can experiment with the best view option that fits you. When I plan an event that is usually a week or more ahead of me ill change my setting to "month" view. During the week ill usually leave my view settings to 4 days. When I am looking at my calendar in the beginning of the week (usually Sunday) i'll change my settings to "Week". When I am studying throughout the day I'll usually put my calendar settings to "day" or "agenda".
In this post I plan to explain the features Google Calendar has to offer you. In future post I'll go more in depth about how to put these features to use.
Once you have created your gmail you will have access to Google Calendar. You can access your Google Calendar by starting at your Google Search page. At the top of your Google search page you should see a black bar with labels that read from the left to the right starting with, Search, Images, Maps, Play etc. Eventually you should see a label that says "Calendar".Once you click on the label "Calendar" at the top of your Google search page you should see a calendar similar to the image below.
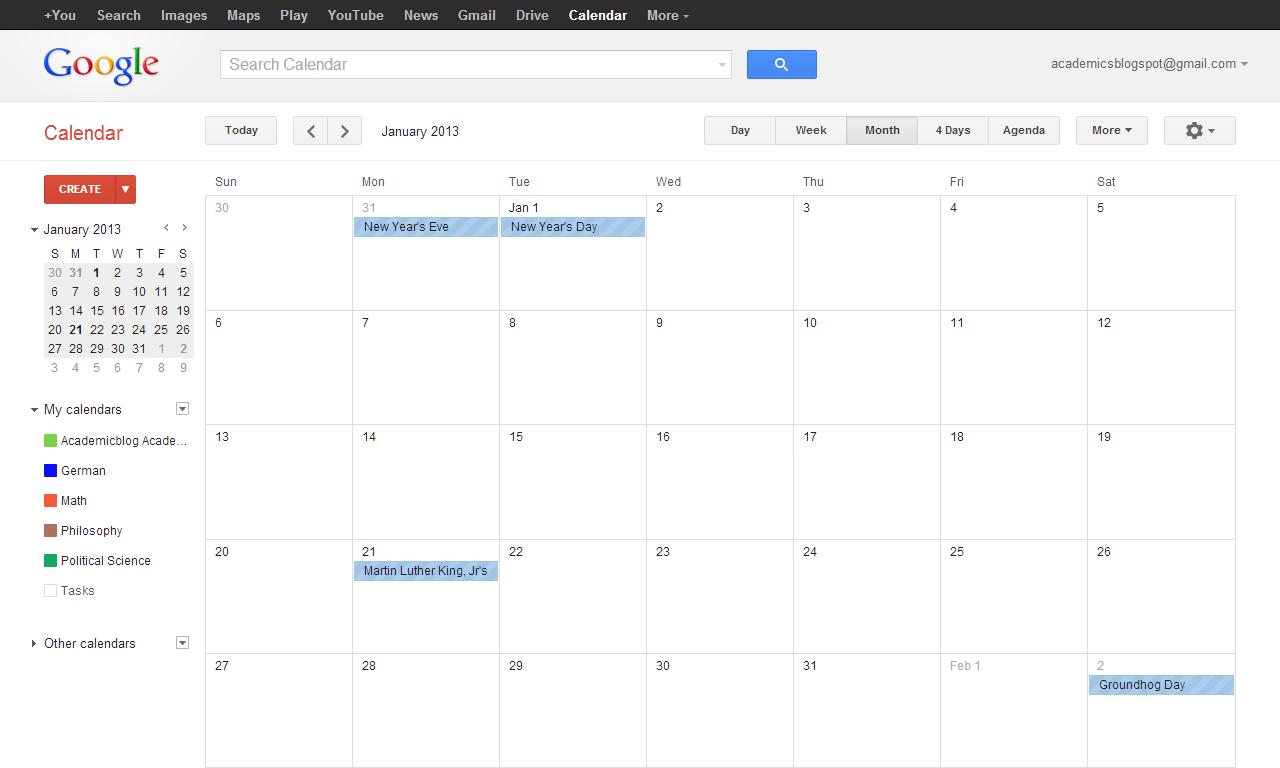
Above is a screen shot of new calendar that I created. In this post I will explain the features Google calendar has to offer and what they can be used for.
- Starting at the top left hand side of the page you will see a red button labelled "Create". Clicking on the "Create" button will give you the opportunity to plot an event on your calendar. The events that you create will represent required readings, study periods, class times, groups meetings and due dates for each class.You can create a event for anything that you feel its necessary for. By creating these events you are constantly preparing your self as the semester unfolds. Remember you are a hurdle runner in this race and by creating these events on your calendar you are timing your steps to successfully make a leap over the stick ahead of you.
- Below the "create" button there is a smaller monthly calendar. This is useful to have a visual to see where you are in the month and to see how much time you have left.
- Below your miniature calendar you will notice a label that reads "My Calendars" with a drop down arrow to the right side. If you click on the drop down arrow you can create a sub calendar for each class, which will eventually be inputted into your larger calendar.As you can see from the example above I have created sub calendars for each class. Now that you have a calendar created you can create sub calendar for each class that you have. After you create a calendar for each class you also have the option to color coat each calendar that you create by clicking on the drop down arrow on the right side. Go ahead and create a calendar for each class an color coat it.
- The last few features that I would like to mention are the different viewing options Google provides you. At the top right side of your calendar you have five different views that read from the right; Day, Week, Month, 4 days and Agenda. As you use Google calendar you can experiment with the best view option that fits you. When I plan an event that is usually a week or more ahead of me ill change my setting to "month" view. During the week ill usually leave my view settings to 4 days. When I am looking at my calendar in the beginning of the week (usually Sunday) i'll change my settings to "Week". When I am studying throughout the day I'll usually put my calendar settings to "day" or "agenda".
No comments:
Post a Comment